.
 Productivity Tip Productivity Tip
Providing you are driving your outbound communication form the Member Contact Screen (double click an email line to send an outbound email and so on...) Journal entries are created automatically. But what about the cases where communication is inbound? Faxes, Scans and emails for third parties such as underwriters, also need Journals creating. In version 5.0 we have made this even easier with the Incoming Communication button on the Conversation Screen.
|
 Journal Outbound Communication
| 1. | As you have seen in the pervious 'How to' Quick Start sections, making an outbound call, sending an outbound email, setting up an appointment, writing a letter etc... all creates an appropriate Journal automatically. |
| 2. | If you are still not sure about these processes, have a look through the previous 'How to' sections and or talk to other E-Broker users in your office. |
|
Journal Incoming Communication
| 1. | If you are wanting to log inbound communication about a client (not an inbound email from a client - this can be handled automatically - see Outlook Synch) you can do this from the Conversation Screen 'Other Communication' button. |
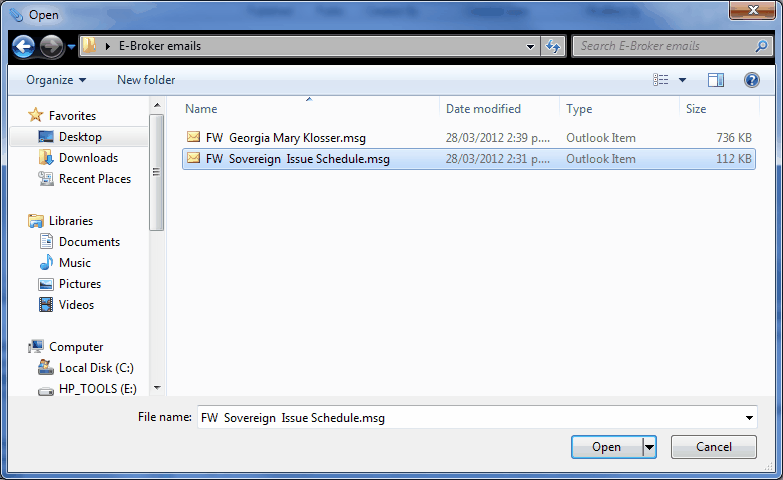
| 2. | However there is one small thing to do before starting this process. Best to first grab the incoming email, fax etc... and drag them into a folder - perhaps as a shortcut from your desktop. The reason for this is that you can't grab an email message directly from Outlook (yet). |
| 3. | A neat trick I learned the other week was that if you drag an email from your inbox list and drop it onto your desktop, or into a folder, it is automatically saved as an outlook message format (.msg). This is then ready to be grabbed and Jounalled into the client file. |
| 4. | Once you have done this, go back to the Conversation Screen and click the Other Communication button. |
| 5. | Complete the various fields and make a short Journal note about the communication. |
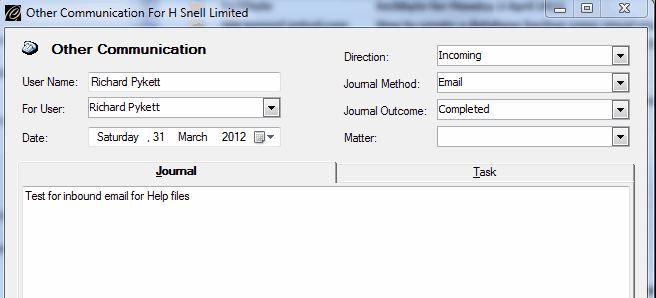
| 6. | When you are done, click Save at the bottom of the screen. |
| 7. | The Journal is now saved and you are presented with the attachment window ready to attach the message or scan etc... |
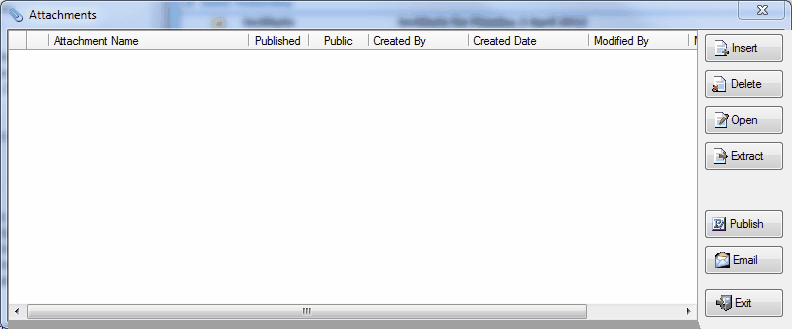
| 8. | Click the Insert button and drive off to find your previously saved attachment. |
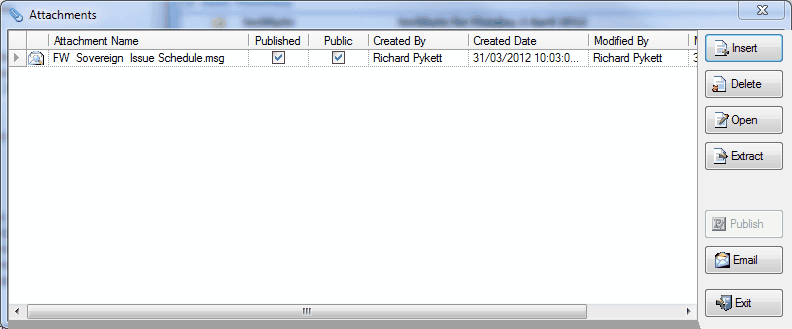
| 9. | The attachment is now inserted into the client record |
| 10. | Click Exit to finish the process. |
|
See Also: Outlook Synch

