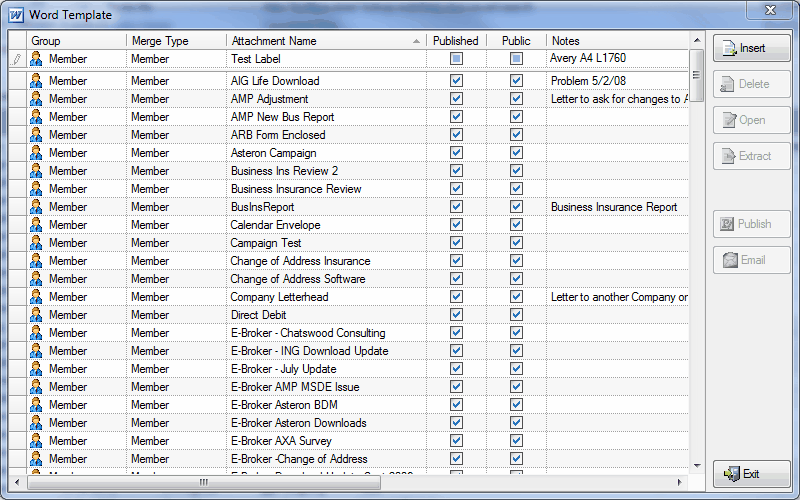
 Productivity Tip Productivity Tip
Previously running a set of mailing labels after running a Write Letter campaign, was a bit cryptic. Now in Version 5.0 you can click to run a set of mailing labels all in the same campaign operation.
|
 Mailing Label Setup - Office 2003
| 1. | Word does not make this the easiest thing.. |
| 2. | Firstly make sure you have your labels to hand and you know their size and maker's code number |
| 3. | Go to Admin / Word Template and create a new document called Mailing Label and in the comment area, write in the code number of your label - e.g Avery A4 L7160 or similar. Also have this tattooed to your forearm or other handy place for future reference. |
| 4. | If further down the track some bright spark wants to change the mailing labels you purchase, shoot them and bury their body behind the barn. After all, you now have a tattoo, so must be adept at this kind of thing. |
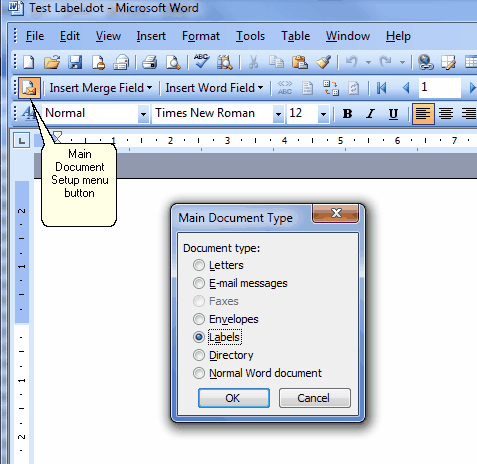
| 5. | Open up your new blank word template and find where the nice people at Microsoft have chosen to hide the Main Document Type menu this week. Once you have spent a couple of hours locating this menu, select Labels. |
| 6. | After to have located and retrieved the Holy Grail, sorry Main Document Type menu, you should end up with a Label Options menu, but no promises. |
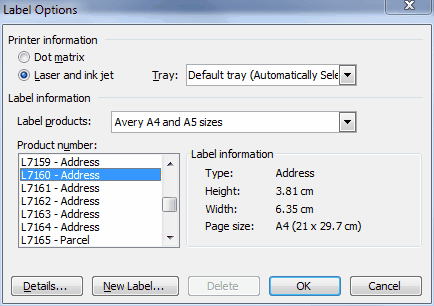
| 7. | Locate and select your label type. Take a valium if your accountant has bought a cheap label type which is not on the list. |
| 8. | If your label is not on the list and you are now comfortably numb, scroll to the bottom of the Label Products menu and select Other/Custom. Take another valium. |
| 9. | Click the New Label button |
| 10. | Name the Label exactly as it is printed on the label box - e.g Impact LC 33 70x25. Phone your local tattoo artist. |
| 11. | From this point onwards, never ever change the labels you buy, and never ever change your version of Word. |
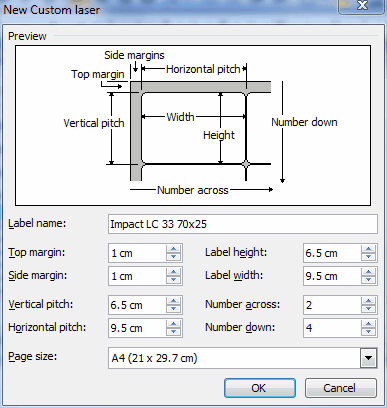
| 12. | Measure your blank sheet of labels for the top margin value and input this into the screen. |
| 13. | Complete the other values, number across and number down. |
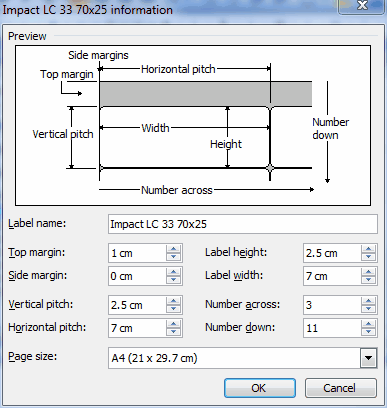
| 14. | Click OK and if your measuring and maths are OK, the label will save. |
| 15. | If the label won't save, you have goofed somewhere on your measurements - generally the header value is an issue. |
| 16. | Persevere until the label will save without protest. |
| 17. | Click OK to be taken back to your main document. |
|
Mailing Label Setup - Office 2010
| 1. | Again Word does not make this the easiest thing.. |
| 2. | Firstly make sure you have your labels to hand and you know their size and maker's code number |
| 3. | Go to Admin / Word Template and create a new document called Mailing Label and in the comment area, write in the code number of your label - e.g Avery A4 L7160 or similar. |
| 4. | Open up your new blank word template (not the FormLetters1 document which also opens at the same time). |
| 5. | Don't start by clicking on the very prominent Labels button, as trust us, it will end in tears... |
| 6. | I know you don't want to do a mail merge at this point, but start by clicking on START MAIL MERGE. |
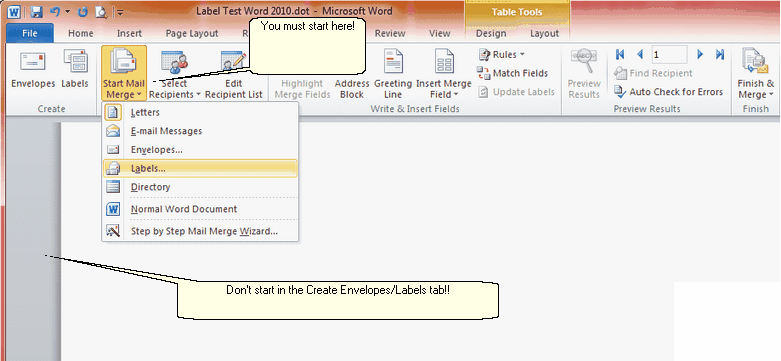
| 7. | Choose Labels from the drop down menu. |
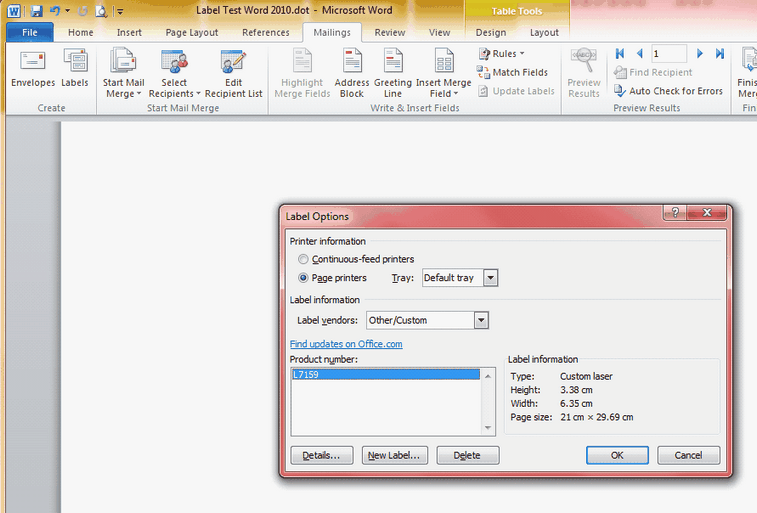
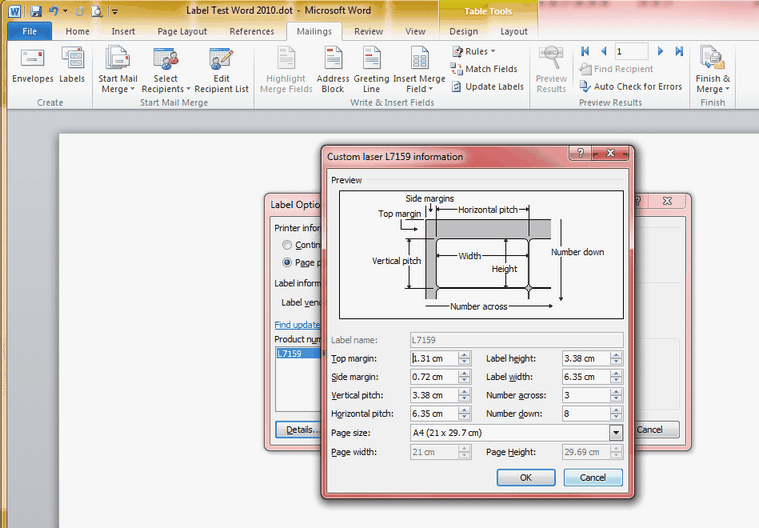
| 8. | Follow the menus and select or set up your mailing label. |
|
Mailing Label Document Setup - Office 2003
| 1. | You should now have a main document with divisions according to your chosen mailing label. |
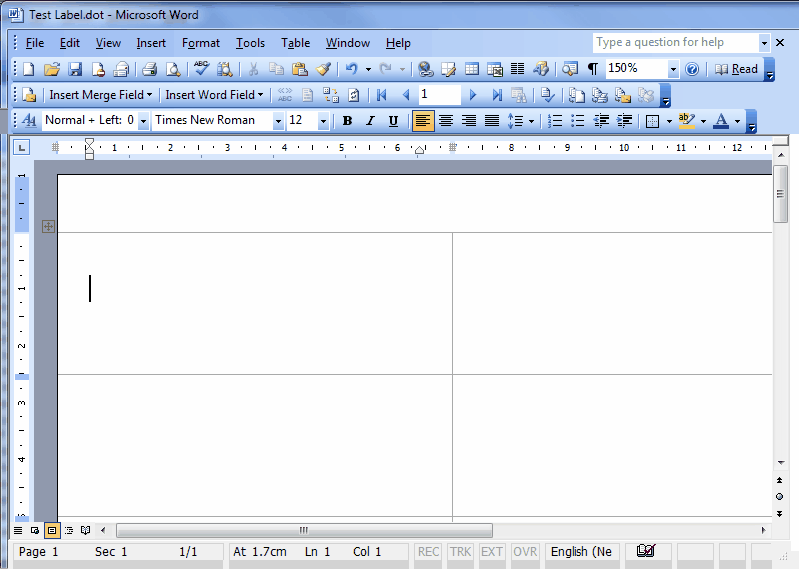
| 2. | Now you are able to start inserting your Merge Fields. That is if you can find the insert merge field menu... Yet another great reason to stay with Word 2003. |
| 3. | Start inserting your merge fields. Don't worry about them spilling over, Word will sort this out once you do merge. |
| 5. | Now play 'find the Propagate Labels button' game. |
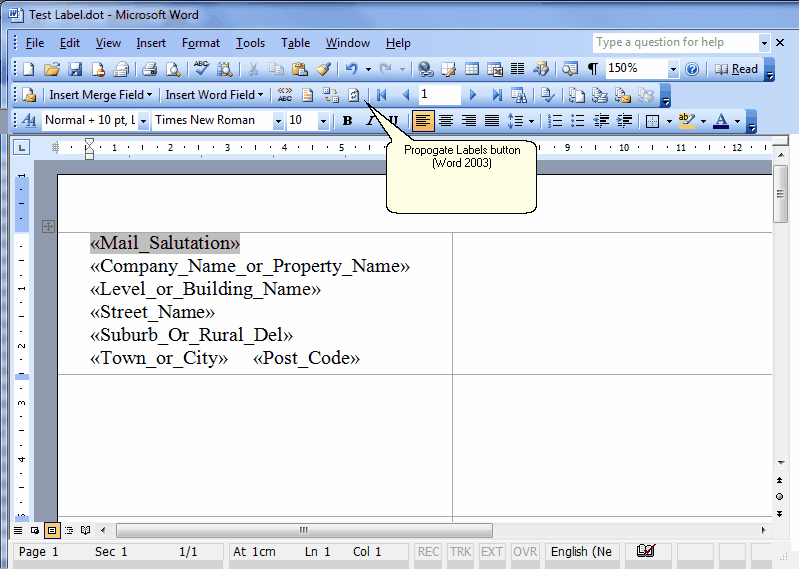
| 6. | Click on Propagate Labels and the merge fields will be magically propagated to the rest of the page. |
| 7. | Take another valium if you have any left. |
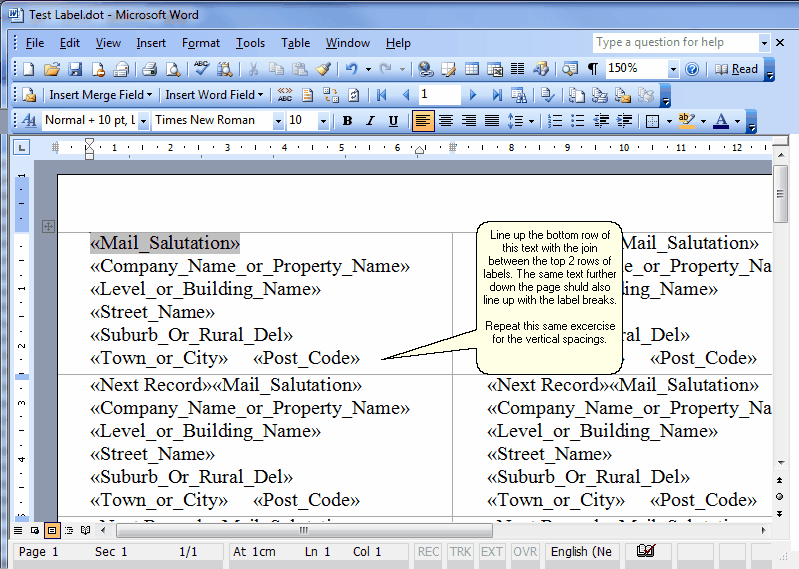
| 8. | Save the document using the save icon |
| 9. | Now trigger a print of this page so you can troubleshoot any spacing issues. |
| 10. | Overlay the printed page on your sheet of labels. Try to line up the bottom row of text on the top label of your print, with the line between the first row of labels underneath. Holding the whole shebang up to the light may help. |
| 11. | Now look at the label text as you scan down the page - does it creep? |
| 12. | If it doesn't, you are in luck and will have soundly earned your converted 'Creating Mailing Labels' Scout/Guide badge and diamond woggle clip. |
| 13. | If it does creep, take another valium, go back to the start and do it all again. |
|
Mailing Label Document Setup - Office 2010
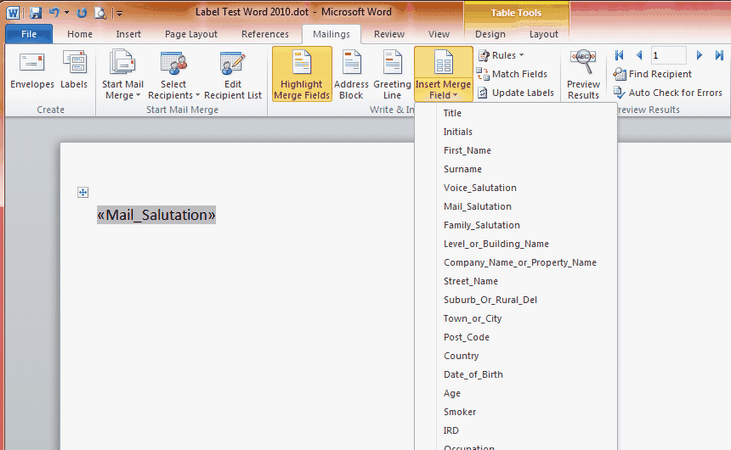
| 1. | Having set up your document with the correct label dimensions, we can now add the required merge fields |
| 2. | Make sure you are still in the Mailings Tab |
| 3. | Drop down the Insert Merge Field button |
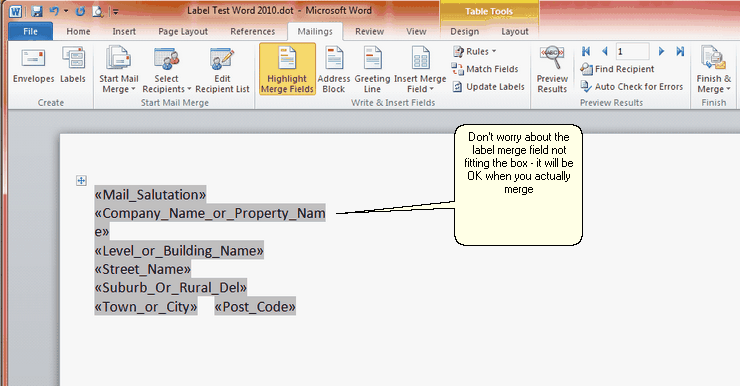
| 4. | Start to insert the merge fields for the first label |
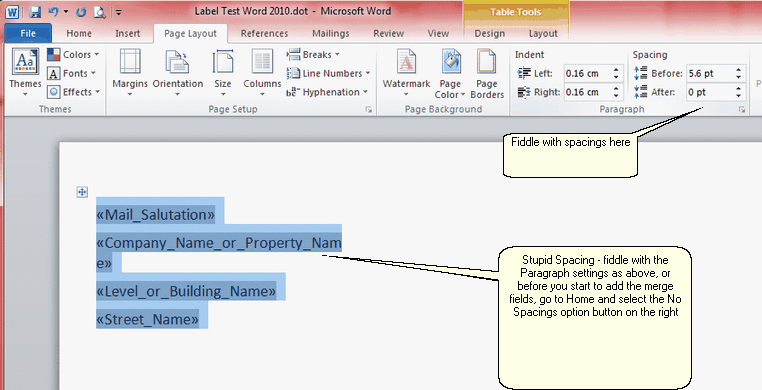
| 5. | It's quite likely that the stupid Word 2010 program will give you an unwanted spacing between the lines. |
| 6. | You can fix this either by going to the Page Layout tab and fiddling (technical term) with the paragraph spacings, or you could go to the Home Tab before you start to add the merge fields and select the formatting option on the right called No Spacings. |
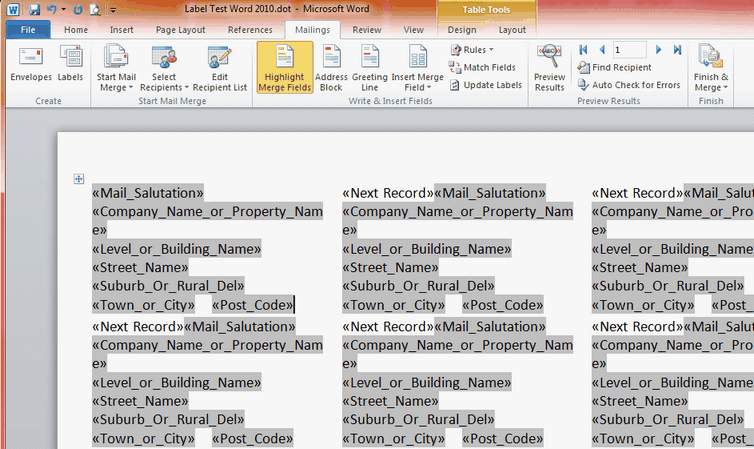
| 7. | Once you have finished adding the merge fields as per above, you then need to copy the merge field to the next label. |
| 8. | The button for this has been renamed again just to keep you on your toes - click on UPDATE LABELS |
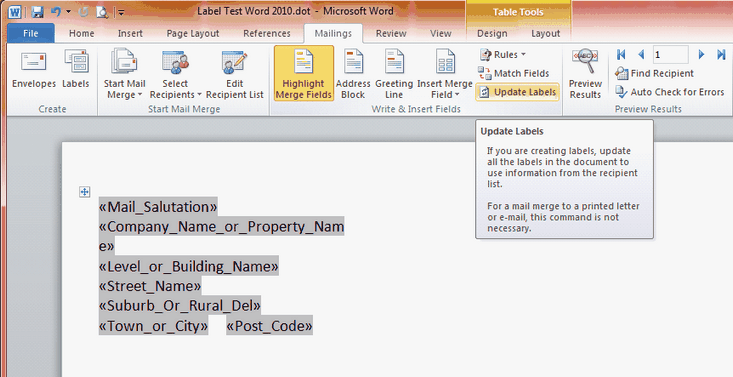
| 9. | You should end up with something like this. |
|
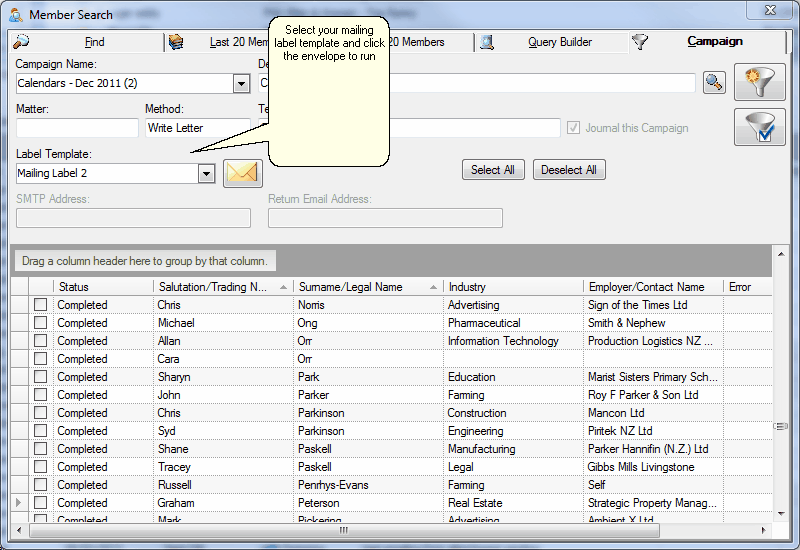
Run Mailing Labels
| 1. | After you have completed running your Write Letter campaign (you can see here our calendar campaign from last year) click on the Label Template drop-down. |
| 2. | Select your mailing label |
| 3. | Click the yellow envelope to the side and your label document will generate. |
| 4. | Print in the normal way. |
|
See Also: Odyssey House, Create a Marketing Campaign

