 Productivity Tip Productivity Tip
Lots of letters get written to clients and insurers over the course of a year, so it make good sense to automate this process as much as possible. With E-Broker Word Templates, you can set up a bank of available merge documents which you can call up from a client record. The system will then insert all of the merge information you have set up in this section and save the completed document to the client Journal.
|
 Types of Word Templates
| 1. | Just a word about Word Templates before we show you how to set one up. |
| 2. | Much of the Word Template functionality is actually in Microsoft Word, rather than E-Broker - E-Broker is simply calling Word and saying 'here is some information for your merge fields'. |
| 3. | Microsoft for some reason only allow a maximum of 62 merge fields per document. Whilst 62 merge field sounds like a big number, you can pretty soon exhaust it. |
| 4. | For this reason, not every field from the database is available in each document. We have had to break documents up into types in order to partly get around this restriction. |
| 5. | This is why we have several different type of merge types - Company, Member, Proposal, Policy. |
| 6. | The main type is 'Member' and this will likely cover 90% of templates you will want to make and use. |
| 7. | The Member template type thus contains all of the common merge fields used when writing to a client (Member). |
| 8. | If however you want to write about a policy, you need a different set of merge fields and these are available logically enough under the Policy Merge Type. |
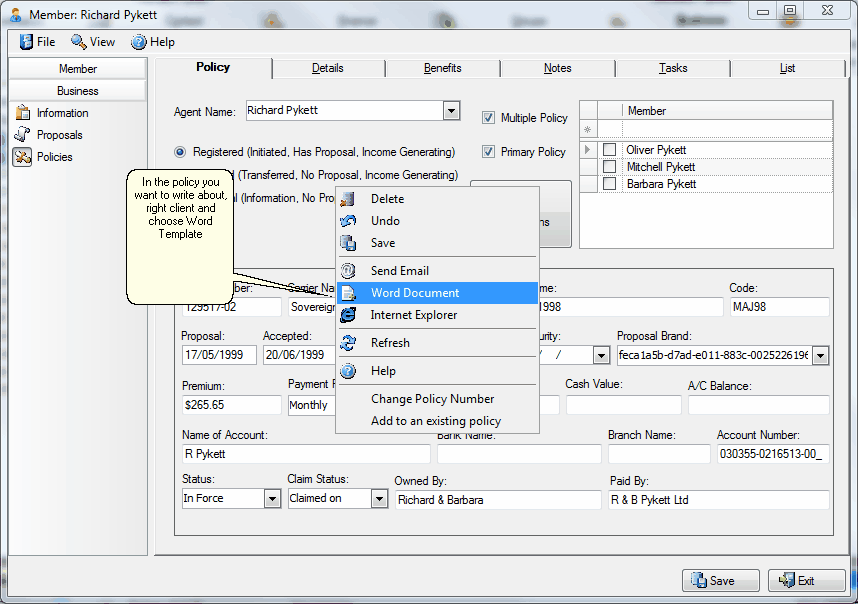
| 9. | Just another word or two on this - if you want to write to a client about a particular policy and have the system do the smart stuff and insert the policy details, you can't do this with a member template, nor can you drive this from the client's postal address in Contact. |
| 10. | If you think about this for a moment - a client can have many different policies, thus if you want to write about a specific policy, you need to start the document from inside that particular policy record by right clicking as below and selecting Word Document. |
|
Set up a Word Template
| 1. | Go to Admin and select Word Template (if this is not an option for you, you will need to see your System Administrator). |
| 2. | The Word Template window opens. |
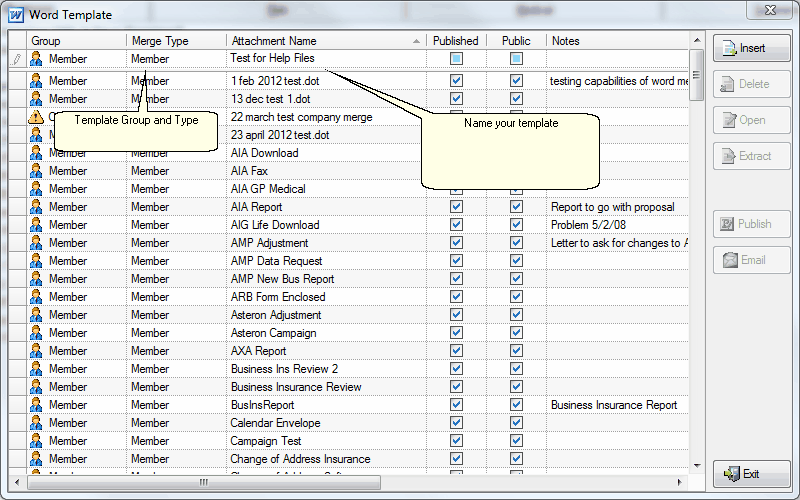
| 3. | At the top of the screen, start a new line by selecting the Group and Merge Type you want. |
| 4. | Name the template in the Attachment Name box - think about how these are going to display alphabetically. |
| 5. | When you are done, press Enter to add the line to the database. |
| 6. | Now go and find you new template line - it may be right at the bottom of the list as the table has not yet re-sorted. |
| 7. | Double click on the left hand end of the line to open the blank template. Now you are ready to inset your merge fields and your boiler plate text. Tip - It's always easier to delete test than to cut and paste. So if your document covers a number of scenarios, type blocks of text for each scenario and then you can simply delete the unwanted stuff when you are creating the document. The other option is to create specific templates for each scenario. |
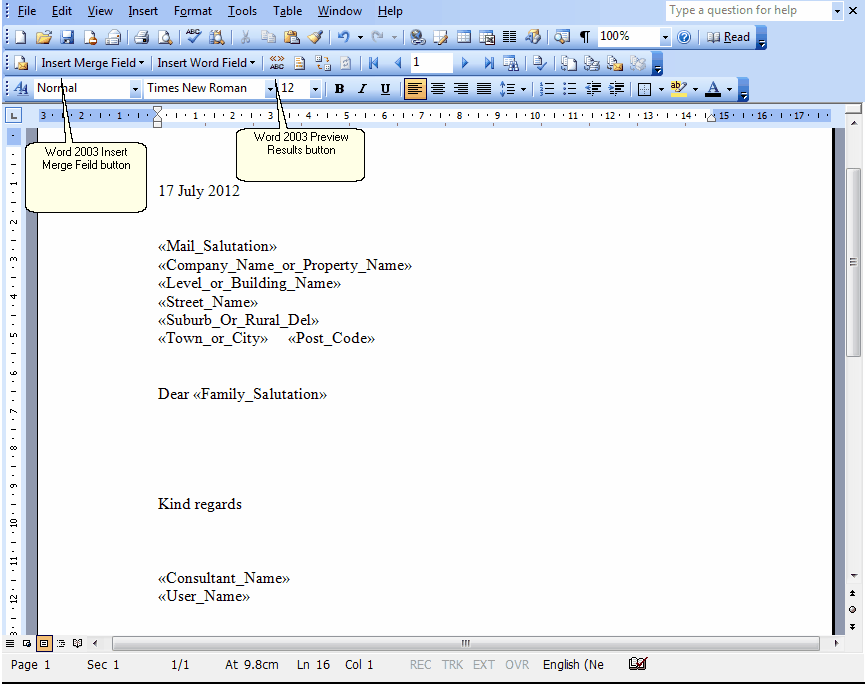
| 8. | Now depending on the version of Word you have, as with creating mailing labels, you must now play Microsoft's latest 'hunt the Insert Merge Field' button. |
| 9. | When you have located the mystery button, you will now be presented in one format or another, a list of available fields from the database for your particular sort of template. In Word 2007/2010 it is under Mailings and in 2003 it is on the Mail Merge toolbar. |
| 10. | Start adding your fields - start with the date. Tip - you may want to use the Microsoft Insert Date and Time function which then gives you a number of different date formats to choose from. Best not to check the 'update automatically' box. |
| 11. | After you have the date inserted, then add the rest of the merge fields as per the picture below. Don't worry about the client not having a Company or Property name - if they don't, the merge will ignore this line and move the next line up for you. Here you will note that we have added both Consultant Name and also User Name. This gives you the option of both signoffs when generating a letter and the ability to delete one. Equally you could just choose one merge field as you see fit for your situation. |
| 12. | Click Save when you are done and your new Template is ready to use. |
| 13. | Don't forget - you are not meant to drive a client letter from here - you create a new letter via the client Contact Screen. |
|
See Also:How to Write a Letter

