 Productivity Tip Productivity Tip
Addresses are one of the most important, but overlooked and misunderstood areas of E-Broker. New users often question why we seemingly store the same address multiple times for a client. Well this is pretty simple. Yes it may look like the same address, but the contact method is different in each case. These contact methods react in a certain way when double clicked - double click an email line and the system launches and journals an email etc... If you put the addresses in properly first time around, your experience and productivity with E-Broker will be much better. In version 5.0, we have added some new tools to make dealing with addresses even easier, such as our address and postcode lookup tool and a new method of setting up addresses for a new member.
|
 Address Screen and Search Function
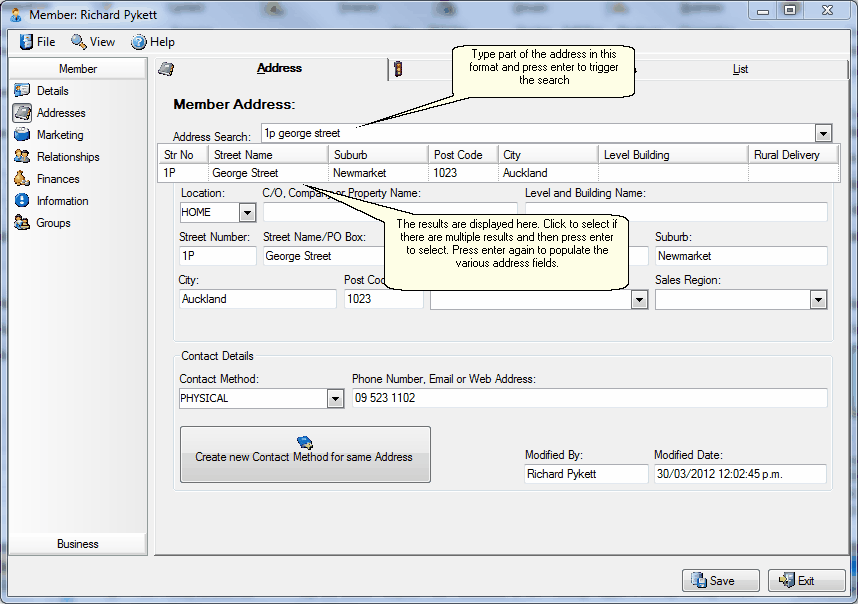
| 1. | The Address Screen is made up of 3 tabs - Address, Special Instructions and List |
| 2. | New to the Address Screen is the Address Search function - type part of a value in here and press enter to trigger the search. Tip -don't type the flat number - just the street number and the street name e.g. 1p george street and then press enter. Always type the street type in full - e.g. road not rd. |
| 3. | Once you have the list in front of you, select the address if there are multiple lines displayed. |
| 4. | The chosen complete address populates the address search bar. |
| 5. | Press enter again and the chosen address is applied to the various fields in the address screen. |
| 6. | This action will of course only update the one address line - you can copy and paste values in the List tab to change multiple lines, or you might just be faster to use the Address Update function -- Address Update |
|
Address List Screen
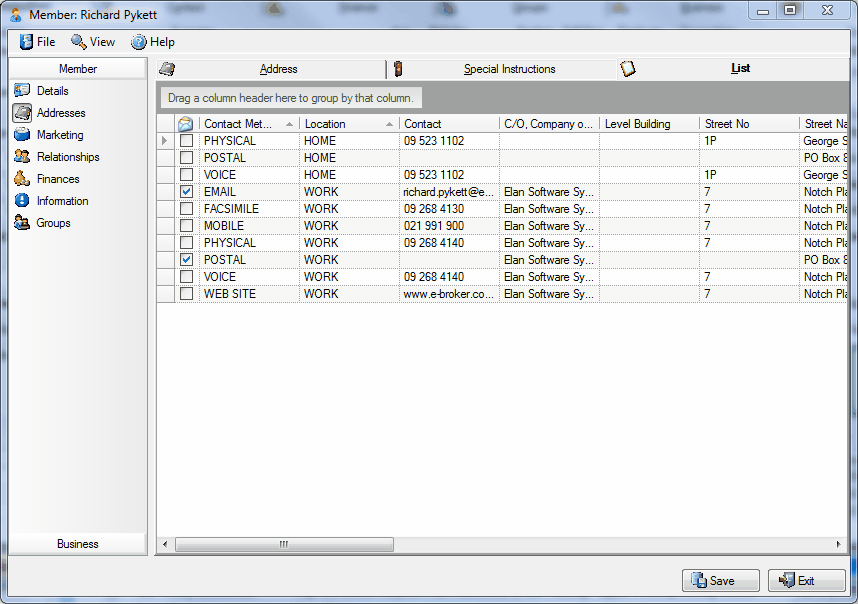
| 1. | The Address List Screen is a very handy place to be able to view and edit all of a Member's addresses in one screen. |
| 2. | If you are looking at changing a whole bunch of addresses for this person or their family, you may be better off using the Address Update screen. |
| 3. | However you can edit in the grid cells and certainly this is the best place to set the mail flags. See the section on Mail Flags below. |
| 4. | You can also change a value in a cell and then cut and paste to other cells. Tip - using the standard Windows Ctl + C and Ctl + V is probably the fastest way to cut and paste between cells. Using the up and down arrows is also very quick using the up and down and side to side navigation arrows. |
|
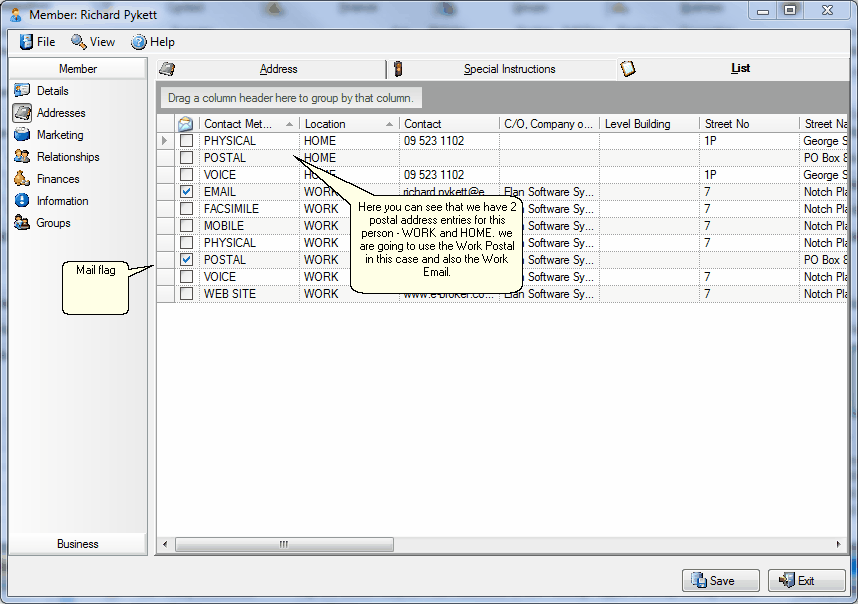
Mail Flags
| 1. | The mail flags are used to tell the system which addresses to use when you are doing mass mail merges (Mail Campaign) or email campaigns. |
| 2. | As a general rule, we like to email to work if this is permissible for a client, and send snail-mail to home. |
| 3. | These flags are vital for campaigning, so a little bit of time spent here is well worth it later on. Without a tick in the box, you campaign to this person will not run. |
|
Add New Address
| 1. | We are not talking here about adding a whole new set of addresses for a new client - more the scenario where you might be adding new address details for an existing client - perhaps cleaning up a record where there were only a few address lines present to start with. |
| 2. | Start from the List Tab |
| 3. | Double click on the address line you are going to use as a base. Here we are starting with 'Voice' and we need to create 'Postal'. |
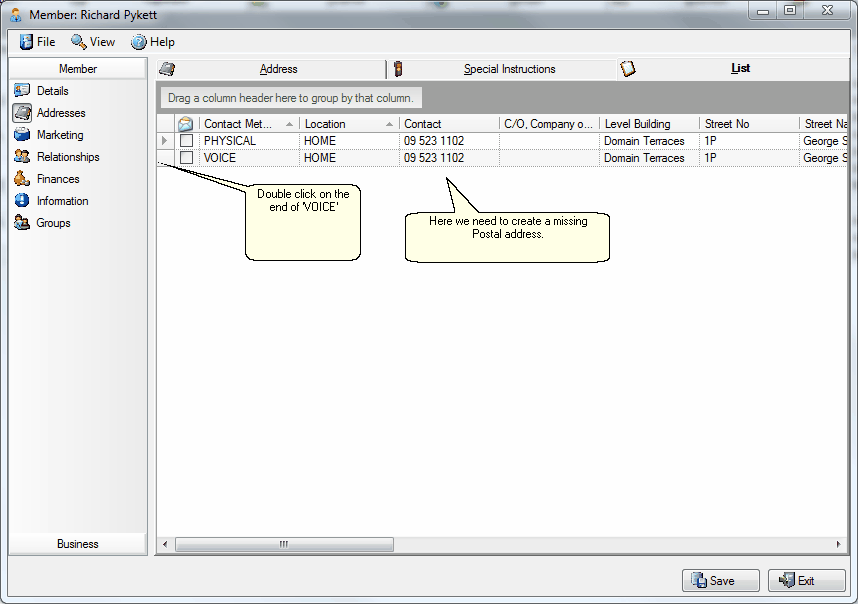
| 4. | The system will take you to the main address screen. |
| 5. | Click the large button 'Create new contact method for same address'. |
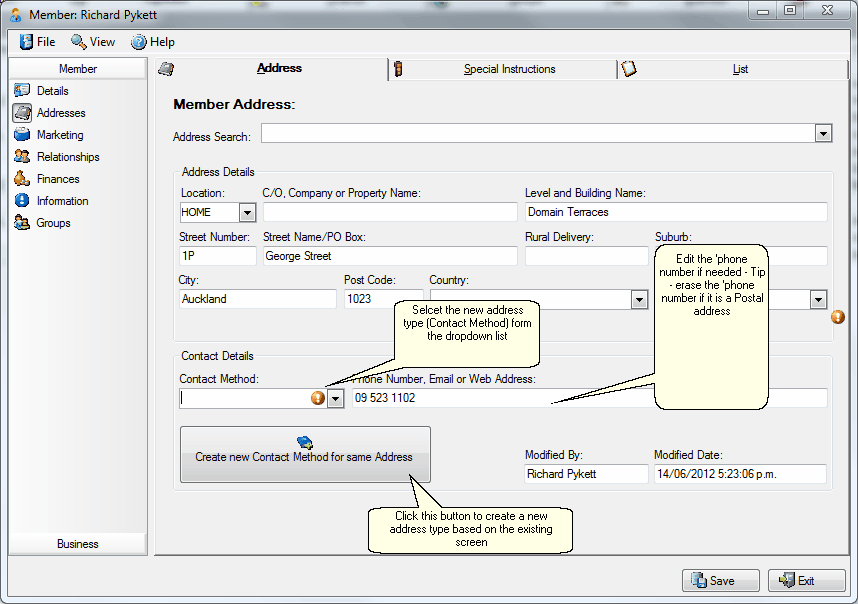
| 6. | The system will create and present you with a copy of this address, and conveniently blank the Contact Method field, ready for you to choose a new address type. |
| 7. | Choose the missing address type - say Postal from this example and click save. |
| 8. | If you want to add another one, click the large button again and select the next address type. |
| 9. | Adjust the 'phone number etc... accordingly. |
| 10. | Lastly, go back to the List Tab and make sure you have set the email and postal flags correctly for the main addresses. |
|
See Also: Address Update, How to Add a New Member

