 Productivity Tip Productivity Tip
We would only recommend using the first method if the client does not exist in the database. The second method writes the appointment back to the client Journal for Workflow, Compliance and Reporting purposes.
|
There are two methods of making an Appointment in E-Broker. One is of much more use than the other.
 Make directly in Calendar
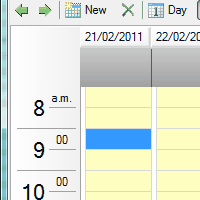
| 1. | Click in the Calendar in the time slot you wish the appointment to commence. The screenshot show 9:00 a.m. on Monday. |
| 2. | Simply start typing the appointment detail and the appointment window will open |
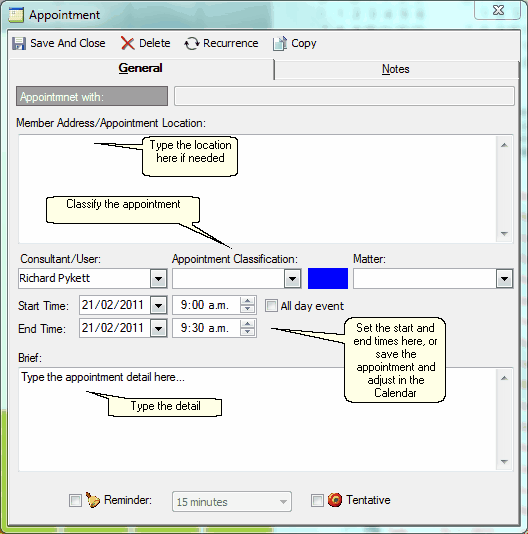
| 3. | Either set the appointment end time with the start and end time drop-downs |
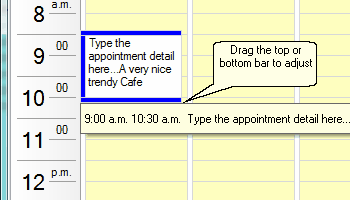
| 4. | Or save and close the appointment and adjust the duration directly in the calendar by dragging the top or bottom bars |
|
Make from the client Contact Screen (preferred)
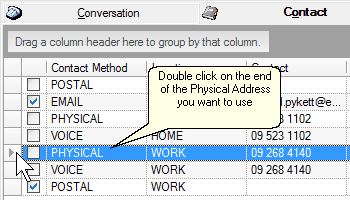
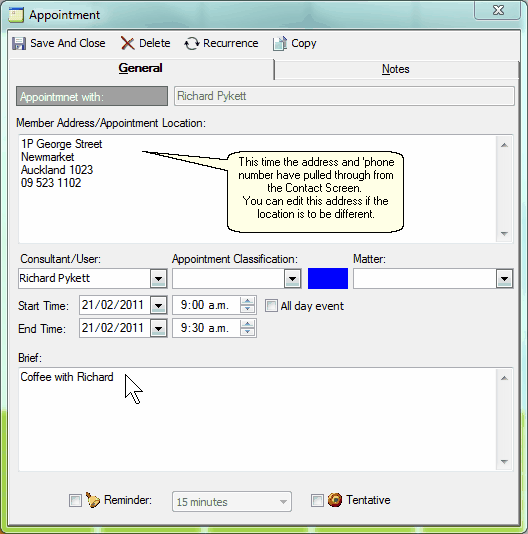
| 1. | Start from the Client Contact Screen by double clicking on the client's Physical Address (even if you are meeting at a Cafe) |
| 2. | Click in the Calendar in the time slot you wish the appointment to commence. The screenshot show 9:00 a.m. on Monday. |
| 3. | Simply start typing the appointment detail |
| 4. | Either set the appointment end time with the start and end time drop-downs |
| 5. | Or save and close the appointment and adjust the duration directly in the calendar by dragging the top or bottom bars |
| 6. | The Appointment is written back to the client Journal and the expected duration noted. In this case it is 1.5 hours. |

|
Make an Appointment for somebody else
| 1. | You can use ether of the above methods to make an appointment for somebody else, providing you have permissions to see their calendar. |
| 2. | If you can't view any other calendars, see your database administrator, or follow the link below regarding setting up a new user. |
| 3. | If you are making from the client file (preferred) double click the client's Physical address line, but instead of clicking in your own calendar to start the appointment, right click at the top of your calendar on your calendar user name. |
| 4. | A list of calendars available to you will appear. |
| 5. | Choose the person the appointment is to be for and open their calendar. |
| 6. | When their calendar opens, click into the appointment time slot and complete the appointment in the usual way. |
| 7. | The appointment will be journalled back under the client, and it will be noted that you have made the appointment. |
|
See Also: Setting Up a New User

